|
Cloning a
Database Instance
Step by step
walk-through:
Enter DbClone URL e.g.
http://64.83.45.3:5555/Cloneie.html
and login to DbClone login-applet to start DbClone
Console.
DbClone Console
provides links to Logout, Error Help, Refresh Tree and Operation Log
to help the user in operation on top right corner. The Left
part of DbClone console
is navigation tree that provides detail hierarchy Hosts oracle Homes
and database with in branches like Clone Oracle
Oracle Database & Objects, Refresh Oracle Database, Migrate Oracle
Database Platform, Create Stand-by Oracle Database, Convert 32/64
bit word size, Manage DbClone, Manage Database/Listener, Manage
Scheduler Templates, DbClone Reports. Tree structure changes
according to the privileges given to user. DbClone Console Central
window is work area for operational inputs and wizard like
operations.
Screen shots of the Dbclone console are available on
his page.
DbClone Console:
Dbclone Console uses Left mouse click
to open a tree nodes and right click for selecting an operation.
Operations such as Cloning/Refresh/Migrating are performed by
selecting the corresponding node in the tree shown on the left
panel of console. Expand each node to select the desired
operation.
Databases registered with DbClone can
be cloned by few mouse clicks by selecting a source a Host, Oracle
home and a Database on the tree and then selecting a matching
Host, Oracle Home and entering the Target Database on the Central
Window of DbClone. Proceed and cancel buttons are provided to
navigate between the Central Windows shown below.
Home:

For example to clone a database
as shown in the console picture "NEWCLONE’ under oracle home /opt/d09/ORA816/app/oracle/8.1.6 on server “missun2”, navigate the tree starting with “Clone
Oracle Instance” node until the source database is located.
User Input:

Click on the source database
“NEWCLONE” to start the cloning process. You will be asked
to select the target oracle home into which you want to clone the
database, enter the target database SID, select the cloning method
(online/offline) and cloning level (directory/file). Click on
Proceed button to go the next step.
Database Info:

The second step displays
information about the source and target database. If the information
displayed is correct, click on Proceed button to continue or Cancel
button to
modify/abort the process.
Mapping information:

This step shows the location of
source data files, suggested location of target data files, required
disk space and available disk space on target host. Location of target data files
can be changed, if required. Click on Approve to continue
or click on cancel button to go back.
Instance Parameters:

Fourth step of Cloning process
displays the parameters of target database’s initialization file (initXXXX.ora).
By default the parameters are same as the source database’s
parameters. The target parameters can be modified if required. Click on Proceed
button to start the actual cloning process.
Ready to Clone:

The ready to Clone message allows
to start the cloning right away or schedule the cloning for
later time.
Warnings before Start:

DbClone provides a final message window and
summarizes the exact nature of the operation selected. It provided the warning
messages to operators to take certain actions before proceeding. This is an non
stop operation and cannot be stopped if started.
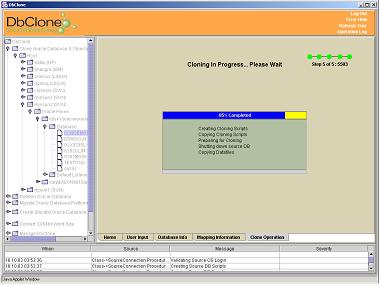
Cloning Progress:

The last step shows the status of
Cloning process in a progress bar and the steps performed
sequentially. If there is any error it shows in a table at the
bottom of the screen.
Cloning Completed:

The 100% completion is last stage of the
successful operation
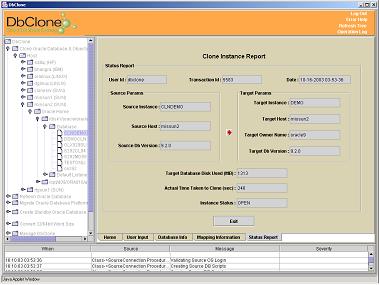
Success & Summery Reporting:

on successful completion of the operation a summery
one page report is presented. Click on the exit button to
see the newly cloned database in the tree.
|
